

A Whole Property Walkaround That Catches Problems Before They Spread
Small problems rarely stay small when it comes to your home. A hairline crack in the foundation, a slow roof leak, or a soggy patch in the yard can quietly turn into a five-figure repair if nobody notices it in time. The good news is that most of these issues leave early warning signs that a careful walkaround will catch. Setting aside a few hours twice a year to inspect your property systematically can save you thousands of dollars and a lot of stress down the road.
Inspect Your Roofline and Gutters From the Ground Up

Your roof takes more abuse than almost any other part of your house, absorbing sun, wind, hail, and heavy rain year after year. Walk the perimeter of your home and look up at the shingles, flashing, and gutter lines, checking for anything that looks curled, cracked, or missing. Binoculars can help you spot damage without climbing a ladder, which is safer for a routine check.
If you notice granules collecting in the gutters, sagging sections, or daylight coming through the attic boards, it is time to bring in a professional. A qualified roofer can identify whether you are dealing with a minor repair or a sign of more widespread wear that needs attention before the next storm season.
- Look for missing, cracked, or curling shingles
- Check flashing around chimneys and vents for gaps
- Clear debris from gutters and downspouts every season
- Watch for water stains on interior ceilings near the roofline
Check Foundation Cracks and Exterior Wall Settling
Foundations shift slightly over time, but not all movement is harmless. Walk slowly around the base of your home and note any cracks wider than a quarter inch, especially ones that run diagonally or seem to be growing. Doors and windows that suddenly stick or no longer close properly can also signal foundation movement worth tracking.
Take photos of any cracks you find and measure them so you can compare over the following months. A small hairline crack that stays the same size is usually cosmetic, but one that widens or lengthens deserves a closer look from a structural professional before it affects the rest of the house.
- Measure crack width and length, then recheck seasonally
- Note any new gaps around window and door frames
- Look for bowing or leaning in retaining walls
- Check basement corners for moisture alongside cracking
Evaluate Yard Grading and Water Drainage Patterns
Water should always move away from your house, not toward it. Walk your yard after a heavy rain and watch where puddles form, paying close attention to areas near the foundation, walkways, and driveway. Standing water that lingers for more than a day is a strong sign that your grading needs adjustment.
If you consistently see pooling near the house or notice erosion carving small channels through your lawn, it may be time to consult site grading companies rather than trying to patch the problem with topsoil alone. They can regrade the slope properly so water sheds away from your foundation instead of soaking into it, which protects both your basement and your landscaping investment.
- Watch for standing water 24 hours after rainfall
- Check that soil slopes away from the foundation at least six inches over ten feet
- Look for erosion channels or exposed roots near downspouts
- Note any soggy spots that never fully dry out
Refresh Landscaping Beds and Ground Cover Each Season

Landscaping is not just about curb appeal, it plays a real role in protecting your home from moisture and pests. Walk your flower beds and foundation plantings looking for bare patches, weeds pushing through, or soil that has washed away from heavy rain. Refreshing mulch around trees and garden beds twice a year helps regulate soil moisture and keeps weeds from competing with your plants for water.
Pay attention to how close plants and mulch sit against your siding, since piling material too high against the house can trap moisture and invite wood rot or pests. Keep a gap of several inches between mulch and your exterior walls, and trim back any shrubs that have grown to touch the house directly.
- Keep mulch several inches away from siding and foundation walls
- Replace mulch that has broken down into fine dust
- Trim shrubs and trees away from siding and rooflines
- Check for pest activity in dense ground cover near the house
Test Your HVAC System Before Extreme Weather Hits
Heating and cooling systems tend to fail at the worst possible time, usually during the first heat wave or cold snap of the season, when every other homeowner is calling for help and technicians are booked solid for weeks. Walk through your home and test every vent, listening for unusual noises like rattling, screeching, or clicking, and feeling for consistent airflow in each room. Weak airflow in a single room often points to a blocked duct or a closed damper, while weak airflow throughout the house can signal a struggling blower motor or a dirty filter that hasn’t been changed in months. While you’re at it, check the thermostat’s accuracy with a separate thermometer, and note whether the system short-cycles, turning on and off in quick bursts instead of running a full, steady cycle. Look at the outdoor condenser unit too, clearing away leaves, dirt, and overgrown plants that can restrict airflow and force the system to work harder than it should. A yearly AC service appointment before summer arrives can catch refrigerant leaks, worn belts, or clogged coils before they leave you sweating through a breakdown. The same logic applies in fall for your furnace or heat pump: a technician can inspect the heat exchanger for cracks, test gas connections for leaks, and confirm the system is running at safe, efficient levels before you need it most.
Pay attention to your energy bills as well, since a sudden spike of 10-15% or more often points to a system working harder than it should to maintain the same comfort level. Compare your current bill to the same month last year rather than to last month, since this accounts for seasonal usage patterns and gives you a clearer picture of whether your system’s efficiency is actually declining. Beyond the bill itself, watch for warning signs while the system is running. Uneven temperatures between rooms usually mean ductwork problems or a struggling blower motor, while strange odors, such as a musty smell or a burning scent, can signal mold growth or an electrical issue that shouldn’t wait. A unit that cycles on and off too frequently, known as short cycling, puts extra wear on the compressor and can shorten the system’s overall lifespan considerably. Scheduling HVAC repair early when you notice any of these symptoms can prevent a small fix, like replacing a capacitor or cleaning a clogged filter, from turning into a full system replacement costing thousands of dollars down the road.
- Replace air filters every one to three months; check monthly during heavy use seasons and swap sooner if the filter looks visibly gray or clogged
- Listen for grinding, rattling, or clicking sounds from the unit, which can signal loose parts, worn belts, or motor issues needing professional attention
- Check that outdoor condenser units are clear of debris, leaves, and vegetation, keeping at least two feet of clearance on all sides for proper airflow
- Test your thermostat by switching between heating and cooling modes to confirm the system responds promptly and reaches set temperatures
- Inspect visible ductwork for loose connections, gaps, or crushed sections that waste energy and strain the system
- Compare monthly energy bills for unexplained increases, which often signal a system working harder than it should
Trace Plumbing Lines for Leaks and Slow Drains

Plumbing problems often start small and hidden, which is exactly why they can cause so much damage before anyone notices. Walk through your home checking under every sink, behind toilets, and around your water heater for damp spots, mineral buildup, or a faint musty smell. Slow drains, gurgling pipes, or water pressure that seems to drop for no reason are all worth investigating right away.
If you find recurring clogs or discolored water, it is worth calling a plumbing contractor rather than relying on store-bought drain cleaner every few weeks. Chemical cleaners can mask a deeper issue like a partial pipe blockage or root intrusion, and a professional inspection can pinpoint the actual cause before it leads to a burst pipe or water damage.
- Check under sinks and around appliances for hidden moisture
- Test water pressure at multiple faucets throughout the house
- Look for water stains or warped flooring near plumbing fixtures
- Listen for running water sounds when nothing is in use
Assess Your Septic System and Drain Field Health
If your property relies on a septic system rather than city sewer, your yard itself can tell you a lot about how well it is functioning. Walk over the area above your drain field and look for unusually lush, green grass, soggy ground, or a sulfur-like smell, all of which can indicate the system is struggling. Catching these signs early can mean the difference between a routine pumping and a full drain field installation.
Keep a simple log of when your tank was last pumped and how your system has been performing, since septic issues tend to develop slowly over years. Avoid parking vehicles or planting trees with deep roots directly over the drain field, as both can compact soil or damage the pipes underground.
- Watch for soggy or unusually green patches over the drain field
- Note any sewage odors near the yard or in the house
- Keep heavy vehicles and deep-rooted trees away from the system
- Schedule tank pumping every three to five years depending on household size
Organize Interior Spaces That Hide Moisture Problems
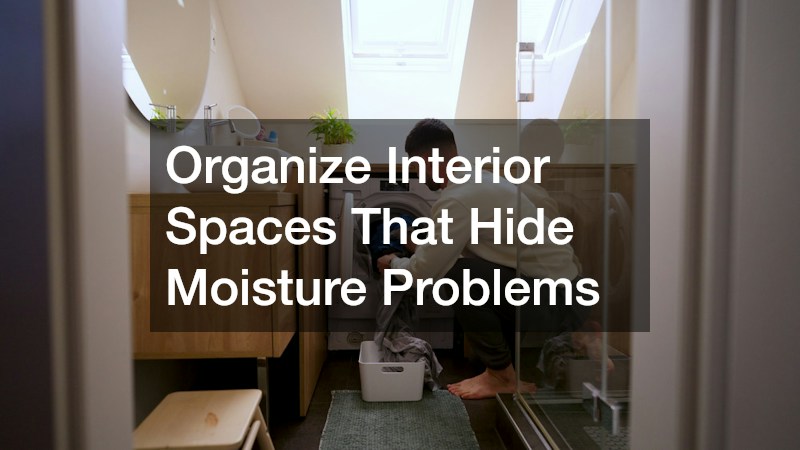
Some of the most overlooked areas of a home are utility spaces packed with cabinets, appliances, and pipes running behind the walls. These enclosed spots trap humidity and hide slow leaks for months before anyone notices, since the damage often develops out of sight behind cabinetry or beneath flooring. Walk through your laundry room and pull items away from the walls to check for water stains, warped wood, or a musty smell that might point to a hidden leak. Laundry room cabinets in particular can trap moisture behind them if a washer hose develops a slow drip, so it is worth checking the caulking and flooring around your appliances regularly. Look closely at the supply lines behind the washer, since rubber hoses typically last only 3 to 5 years before they crack or bulge under pressure. Braided stainless steel replacements cost only a little more and hold up far longer against constant water pressure. Don’t stop at the laundry room. Bathroom vanities, under-sink cabinets in the kitchen, and any closet housing a water heater or furnace deserve the same scrutiny, since condensation and small drips in these spaces behave the same way. A simple moisture meter, available for under $30, can confirm whether wood or drywall feels damp before visible mold or warping ever appears.
While you are in there, test the washing machine hoses for cracking or bulging, since these are a common source of sudden water damage when they finally give out. Squeeze the hoses along their entire length and bend them slightly at the connection points, where stress and wear tend to concentrate first. Also check behind the machine for any dampness, rust on the water valves, or mineral deposits that hint at a slow, hidden leak. Replacing rubber hoses with braided stainless steel versions every five to seven years is a small investment that can prevent a major flooding event. A basic hose kit typically costs between $15 and $30, which is nothing compared to the thousands of dollars in flooring, drywall, and cabinetry repairs that a burst hose can cause overnight. While you have the machine pulled out, check that it sits level and hasn’t drifted closer to the wall, since a hose kinked against the wall or floor wears out faster than one with proper clearance. If your laundry area sits on an upper floor, pay extra attention here, since a failure will send water traveling down through ceilings and walls into the rooms below. Consider installing a simple water alarm sensor near the connections or a floor drain pan underneath the machine as an added layer of protection. These inexpensive safeguards can catch a slow leak long before it turns into a ceiling collapse or mold outbreak in the space below.
- Check behind and under laundry appliances for moisture, staining, or a soft, discolored subfloor
- Inspect supply hoses for cracking, bulging, or corrosion at the fittings, and swap rubber hoses for braided stainless steel every 5 years
- Look inside cabinets under sinks for water stains, swollen wood, or a musty odor that signals a slow leak
- Confirm the dryer vent is clear and exhausting properly outside, since lint buildup restricts airflow and raises fire risk
- Run a hand along under-sink pipes and shutoff valves to feel for dampness or drips that aren’t visible at first glance
- Check basement or utility room walls near washers and water heaters for efflorescence, a white powdery residue pointing to moisture intrusion
- Note any warped baseboards or bubbling paint near bathrooms and kitchens, common signs of hidden condensation
A thorough walkaround twice a year takes an afternoon, but the savings it can uncover are significant, especially when small issues are caught before they spread into major repairs. Keep a simple checklist and photos from each inspection so you can track changes over time and know exactly what to mention if you do need to call in a professional. Whether that means reaching out to roofers, plumbers, or a grading specialist, having clear documentation makes the process faster and more accurate. Start with just one section of your property this weekend, and build the habit from there.